Do it self-service with Chronos Workflow Platform
CHECK OUT YOUR PROCESS DASHBOARD





The regulation will affect any companies that handles personal data of EU citizens. Simply saying, if your organization that has EU citizen employees and customers, this regulation will apply to you - no matter where your current business or entity is based.
The regulation means significant changes in the way organizations collect, report and handle such sensitive dat. More important legislation details that are easy to understand and implement, such as the need for:
However, each organization has a free right about how to deliver on these requirements, but where should we start?
Fortunately, there is a solution that can help your business - called Chronos Workflow Platform (CWP). This solution plays an important role in helping companies to comply with this EU legistlation while you manage business processes even on paper including several personal data and moreover automate and streamline any of it.
Protect your business by adding legal consent for fields and documents those handling personal data.
GDPR obliges your company to collect data only for “specified, explicit and legitimate purposes.”
GDPR requires you to ask for consent when you want to process data like an employee's name, personal tax ID number, SS number, email address, disability information, cultural, genetic or biometric information or even information gathered for background check or SEO surveys.
In these cases, you must ask for consent in a clear and intelligible way and provide employees / customers with clear instructions on how to withdraw their consent should they wish to.
Therefore, when you use a process / document management system processing personal data, you also need to add the consent category for fields. CWP covers such feature by the function of adding consent for process fields and documents.
Find all personal data by custom reports.
EU customers or employees will have the "Right of Access by a data subject" rule (Article 15 - GDPR) to request all digital data you hold on them. Paper but mostly digital data means documents and also process fields include or may include such data. Your business will have to supply it, in its original format and within a month.
Retrieving such data from several systems that use personal data will take countless employee hours with a chance that some information will be missed. However, Chronos Workflow can recognize field values and documents including or may include sensitive personal data you are looking for to be listed.
Irreversibly delete (de-personalize) data without a negative impact on vital business processes.
First, find all places where you keep personal data (you must have done this during your data audit too) and establish a process to delete data from all places. When EU customers or employees ask your company to 'forget' their sensitive data that you are still obliged to store due to specific law then you can keep such data but must refer to the legal purpose.
Once you report personal data in CWP then you can also see why (the legitime purpose) and how long the data is stored, so you may reject the deletation.
However, your employees or even job candidates may also request to keep or change specific data. For this purpose, simply report and easily find all places where you keep personal data within CWP and you can easily update data on request while such field changes are recorded.
The platform has been througly customized to be GDPR compliant for data protection purposes from May/25/ 2018.
Self-service, ad-hoc reporting mechanism.
Look at how the Chronos Workflow Platform (CWP) can automate processes and give your business the functions to address a GDPR compliant response to internal data handling and public (external) Data Handling Access Requests from May, 2018.
Compliance means lower risk of data leakage, fines and sanctions. Also increase highly regulated industries to be compliant with processes, including their ability to show enforcing bodies that business processes are adequately documented. CWP has report functions including historic process versions, audit trails.
Contact Us on This email address is being protected from spambots. You need JavaScript enabled to view it.
A set of one or more linked activities or procedures which collectively realize a business objective or policy goal, normally within the context of an organisational structure defining functional roles and relationships. In other words, the business process reflects the fact that "what needs to happen and be done." A business process is typically associated with operational objectives and business relationships (for example, an Insurance Claim Process, Contract Approval, a Holiday Request Process, a Purchase Request, Engineering Development Process, etc). A process may be wholly contained within a single organisational unit or may span several different organisations, such as in a customer-supplier relationship.
The automation of a business process in whole or part during documents, information or tasks which are passed from one participant to another for carry out various activities according to a set of procedural rules.
A software tool which supports the automation of a business process is defined within a Process Plan (or Process Definition), which identifies the various process activities, procedural rules and associated control data used to manage the workflow during process enactment.
CWP is web-based, self-service and highly user-friendly enterprise workflow software for automating your business processes and managing your documents, content.
Drive the work into the right direction, anytime, anywhere with real-time, collaborative electronic tasks and eforms. Chronos Workflow Platform helps you easily digitize paper-based business activities, operations to electronic format, step by step processes following your policies and methods as well.
| Features | Business benefits |
|---|---|
|
|
|
|
CWP is ideal for a multi-language environment or cross-border operations due to its built-in language management and switching functions.
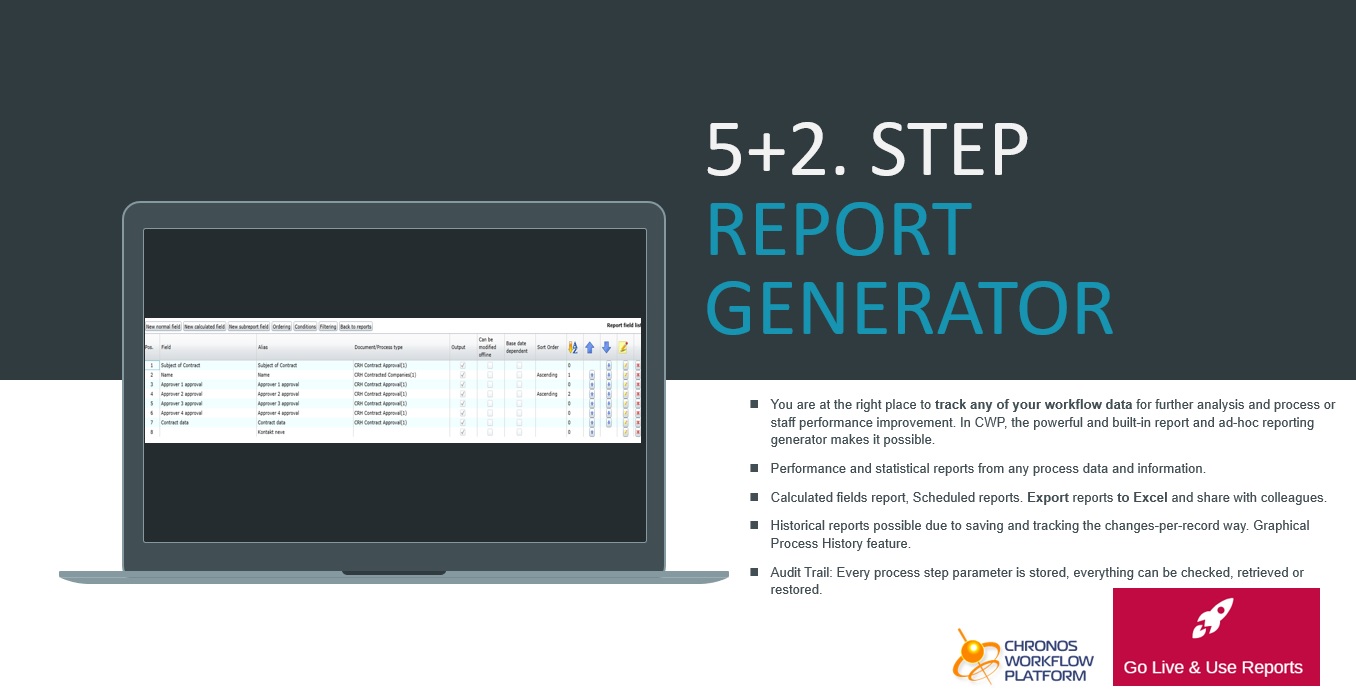
Customized reports can be created easily for statistical, progress or performance reporting. Sophisticated data filter and searching option is also available. Basic filters are like the „Filter by process running dates”, „Process fields”, „Process type”, „Document/Process type”, „Sub-process type”, „Sub-document type”, „Process name”, „Process start owner”, etc. Performance and statistical reports can be created from any process parameters.
Other features:
Chronos Workflow Platform (currently v5.1.64) has a few easy ways to quickly get started with and create your own workflows. Also learn how to manage and customize any process of yours following its initial set up from the scratch.
For system demo access the dedicated web address and login details are provided for you.
When you buy a CWP licence, we install the system on your infrastructure free of charge.
When you buy SaaS subscription plan, we make you a system admin.
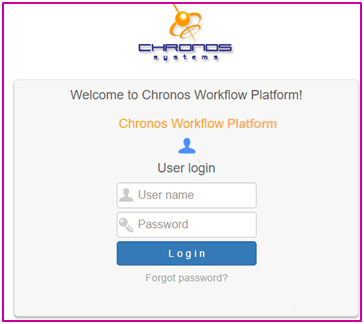
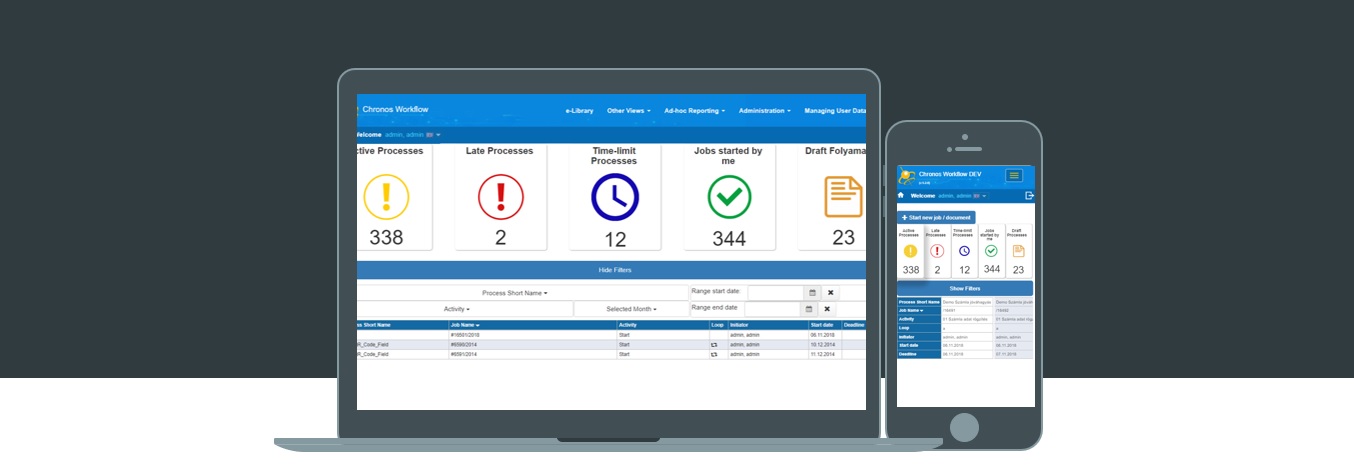
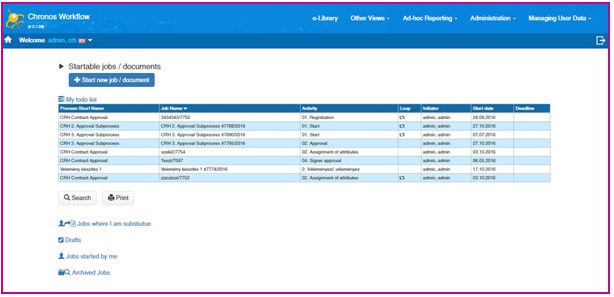
After the successful login, the below and similar system layout shows up:
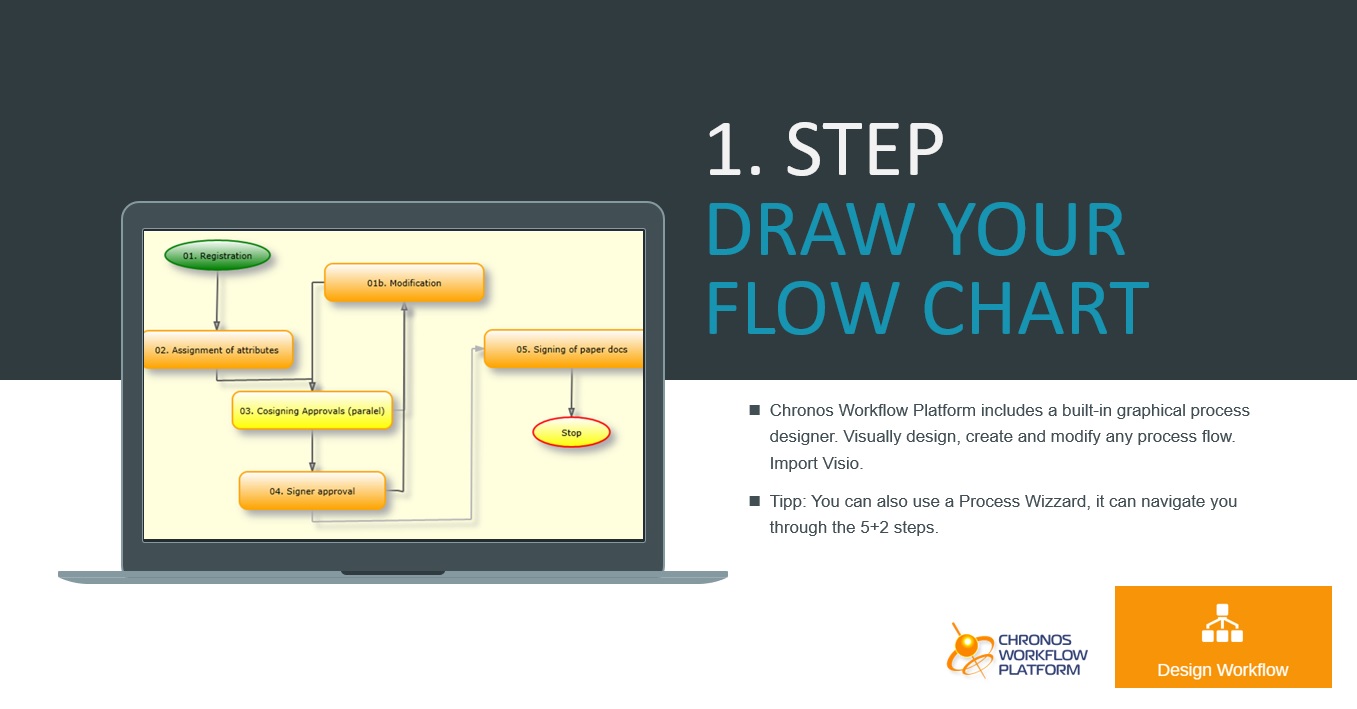
As the result of your business process mapping, the visual process design -your actual flowchart- should be created with the built-in graphic process designer in CWP.
Comment: During the Process modelling and following the process designing phase please take into consideration that everything should be set up with using the main language. CWP provides a multi-language environment, therefore any process design can be created in the English language (as a usual default browser language too) or any other languages. In case of a process import into CWP, each process steps are getting automatically created on a language with the same language used in MS VISIO, etc.CWP allows to translate the step parameters of a Process Type with reediting such parameters (or use the Translation labels functions).
The administration interface only visible to the authorized persons, called the "administrator" users or key users and further specific rights can be also set, such as the organizational adminswho maintenance the organizational structure and its members, reporting users and the document folder administrators. To access the various admin functions the appropriate administrator rights are required, which can be set by the key user during a user setup:
The following user data can be added and CWP indicates the mandatory settings with an asterisk (*) sign:
There are several options to set and those affect the person's certain user rights, can provide unique system administrator privileges during CWP usage and process activities. For more details contact us.
The hierarchy depth has no limits, however the tree structure can be easily managed because other organizational forms , like Matrix organizations have to be set up with a different method by creating document references. Therefore, providing several department relations can be easily solved regardless of organization complexity. Therefore, first the top-level department units should be added in the system, followed by the sub departments and other various "nodes" allowing further splits and fine tuning for a complex but whole organizational structure. The organizational structure can be imported from the MS Active Directory by uploading an AD config and command files. The AD Sync module can build up an entire organizational hierarchy and the users within. The AD synchronization does not overwrite the CWP system administrator users and their priviliges.
Roles may serve as a supplement or even substitute for the sub-department units.
A role can be deleted if no user is assigned to.
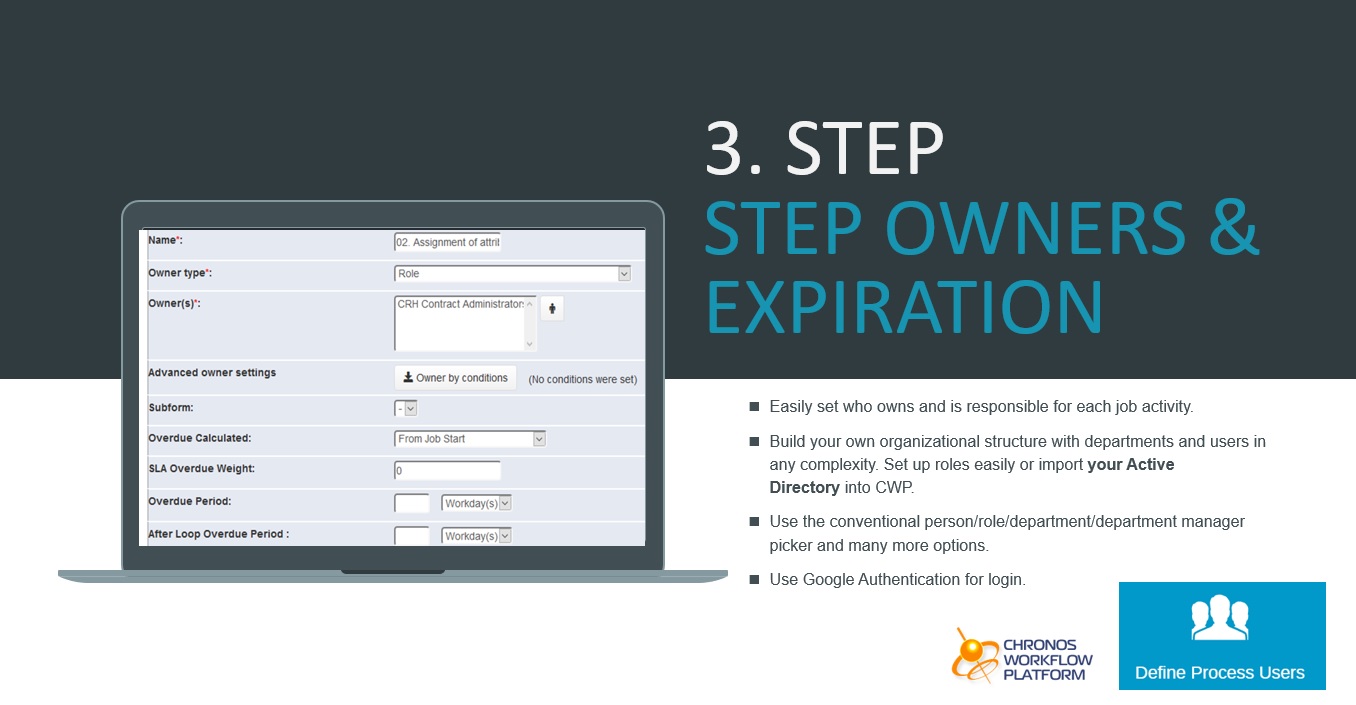
Typically, roles are used in a case of assigning a step owner for a particular process step. In case of a person leaves, moves to other department or gets promoted with a new title then it is not necessary to change the whole business process but only add that person to a new role (for example, creating a role for the financial manager, and such role is chosen as a new Step Owner in the system and the specific person can be added as new member of such role with the Person Picker feature). In case of personal change at a department, only the person needs to be replaced from that role within the system, but the actual process is untouched.
Process Type is a defined process plan which get designed in or imported into CWP but also includes all its parameters including the input and control fields for each process steps. Futhermore, it includes the process step routings, transitions and possible branches.
Click on Manage Document/Process categories.
New Process Category (e.g.: HR process, finance process, logistics process, etc) can be set up by clicking on the New button and only the new category name needs to be added before saving this newly set up category.| Example for different process types | Included processes |
|---|---|
| IT processes: |
|
| HR processes: |
|
| Purchasing processes: |
|
| Customer service processes: |
|
Click on the Administration menu. Locate and click on the Administration submenu and the process administration and hierarchy view opens.
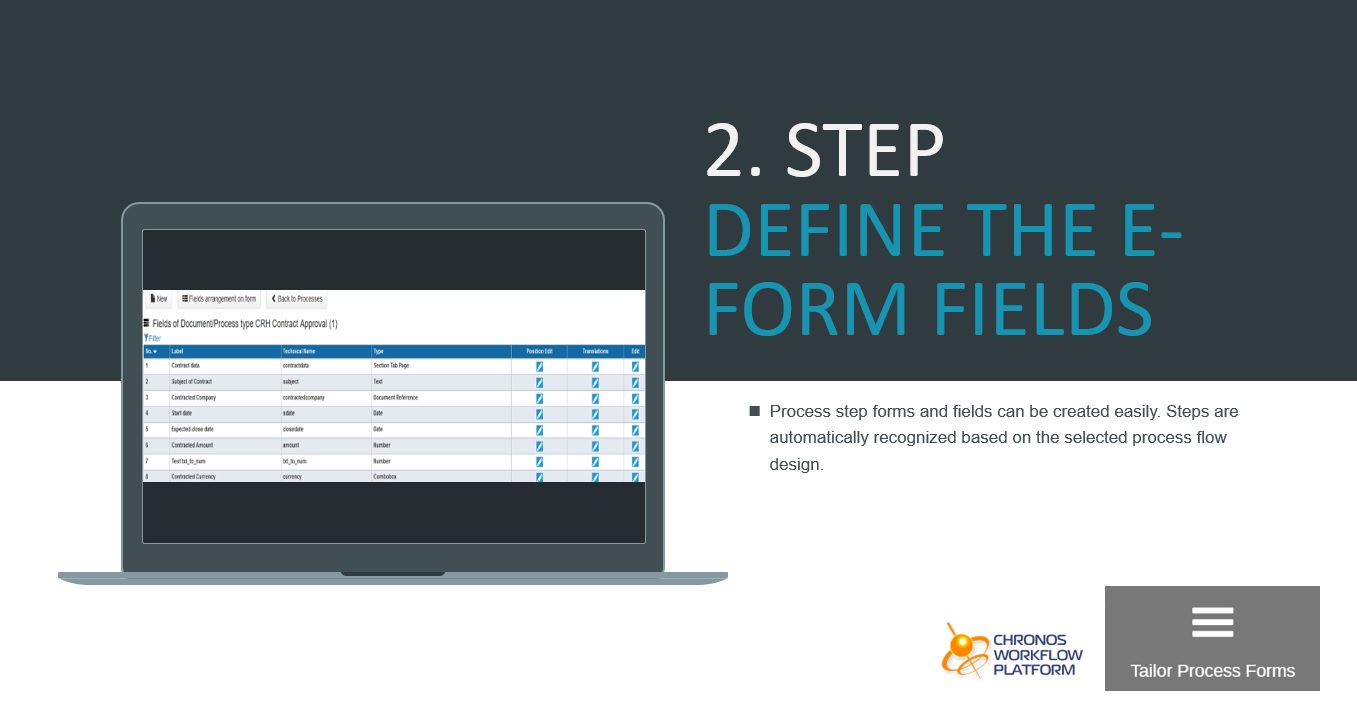
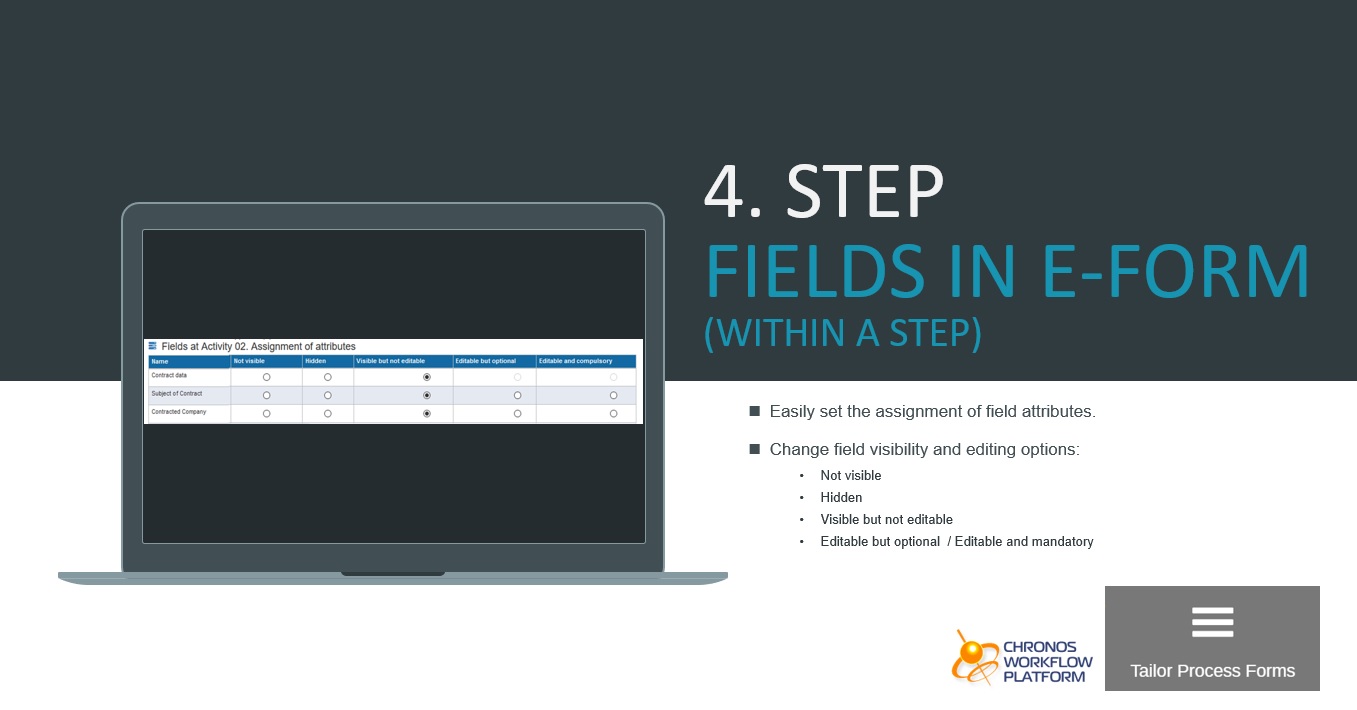
Data for each initiated business processes and its steps (or for a Document Type) will be shown on electronic forms based on the process flowchart selected during the creation of the Process Type. The forms field type, data and its behavior for each steps must be defined.Field properties in Chronos Workflow can be easily set without coding:
Every process includes many fields you want to set as visible and editable in a specific step, but only a read-only or even not visible in other steps. There are wide functional possibilities for setting visibility which can be done very easily in a self-service way:
CWP layout provides a so-called responsive display, therefore it manages the entire screen with a 12-column layout for the best possible resolution and horizontal dimensional display even for any mobile devices where usually the 1 column display dominates. With a form designer you can customize the e-form and even display more than one field into a row, which improves the end-user experience.
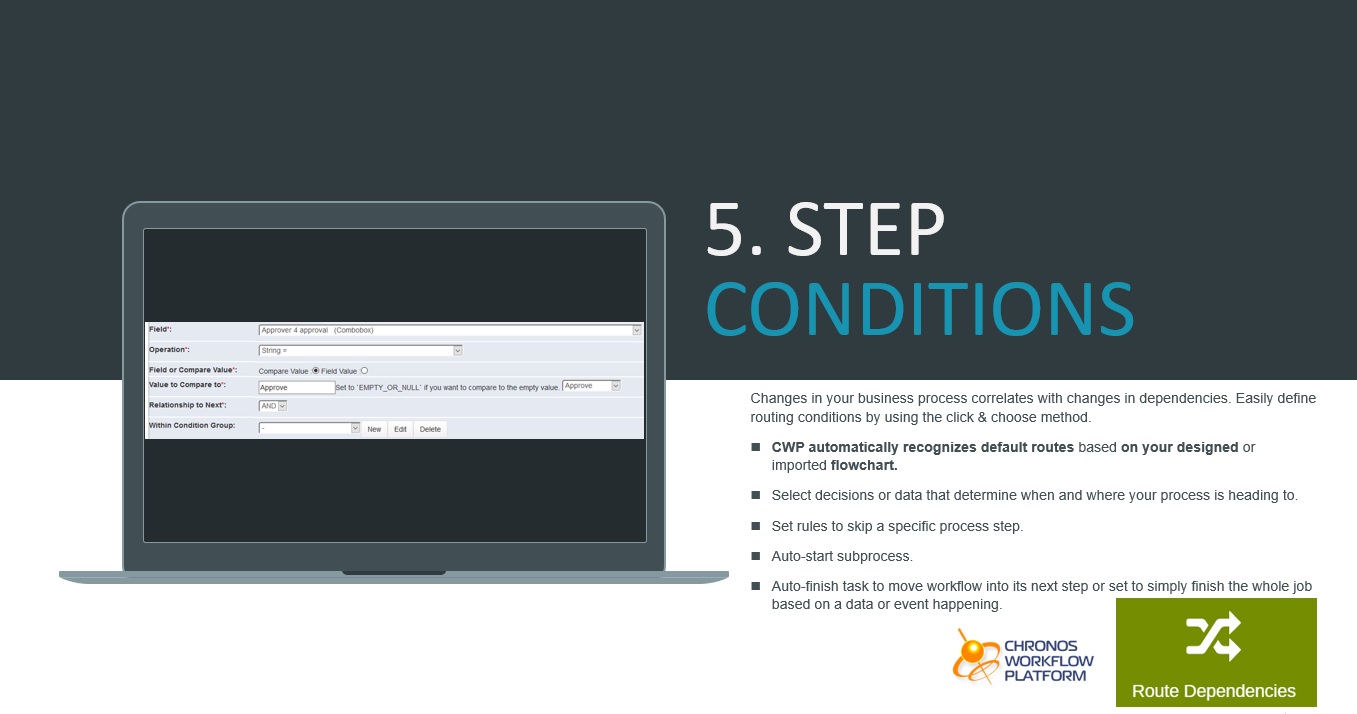
The step transition information describes possible transitions between process activities and the transition conditions that enable or disable transitions during workflow execution.
Further routing controls and process transition can be set, especially if there are multiple outgoung transitions for a job activity, because branch restrictions and condition options should express and control the process flow.
By default, possible step transitions have been determined and recognized when the process flowchart was created within CWP. For step transition settings:
Locate the process step name where you want to configure the routing conditions, and click on the arrow icon in the Routings column for that actual step. The actual routing setting shows the transition condition which was set for the specific process step based on the graphical process flowchart (for example, 'Routing: 01. Registration step -> 02. Assignment of attributes, into the 2nd step'. Meaning the first step moves into the second step).
The Edit function allows to add a specific parameter like the routing name for the specific step transition (e.g.: "transition from 1st step to the 2nd one").
The dynamic routings (step transitions) are intended for processes where pre-conditions are not possible to be defined or a range of options should be provided for the user who should tell (set) which direction the step should go to. However, dynamic transitions are only possible from a step where you set the conditions for. For Dynamic step transition setup:
By default, selecting this function the already set step transition conditions appear. To add a new conditions click on the New button, then choose the desired process step and Save.
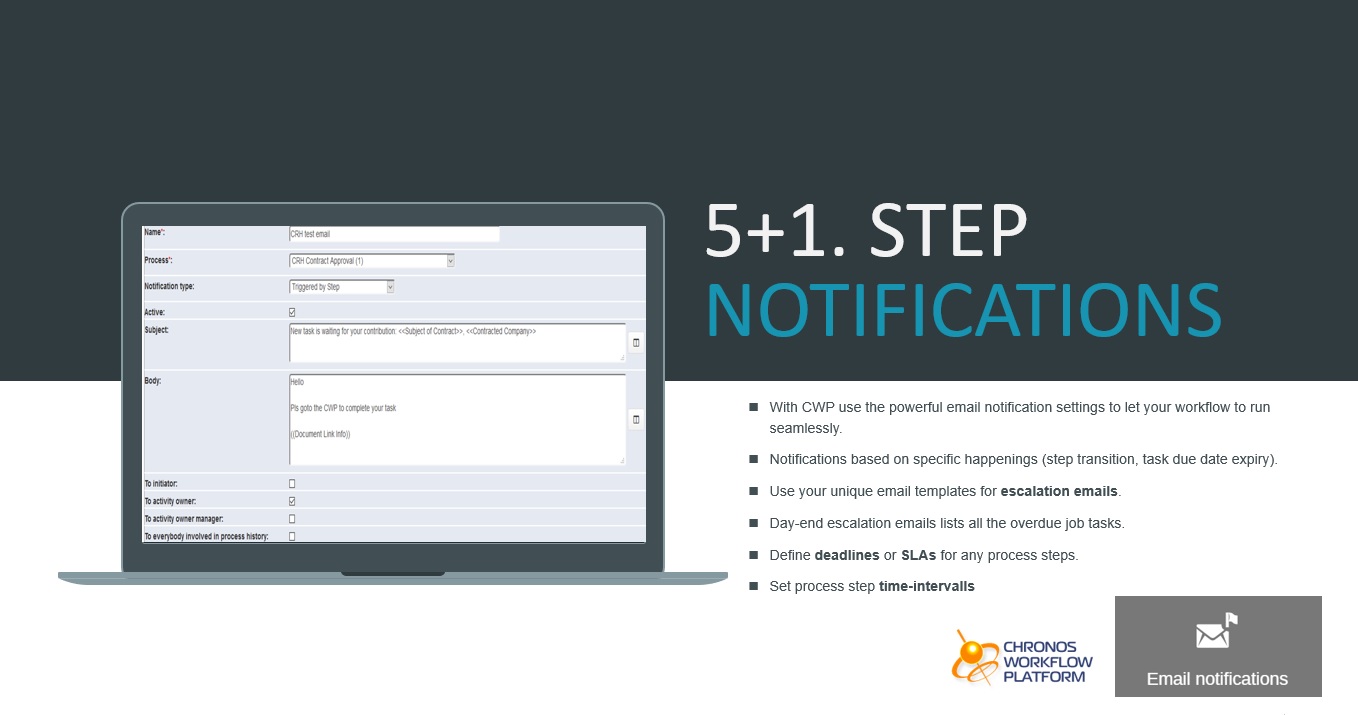
Notification email keeps you and your colleagues up-to-date about any tasks in CWP and it has a very important functionality to notify people on their tasks after a specific due date / deadline expires. Of course, you can customize the notification message template in CWP.
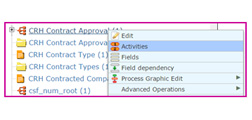
 Select the process in the tree hierarchy and with a right click on it,
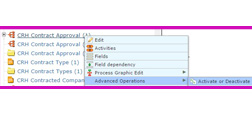
In the process administration section, the process information shows whether a process type is in an active or passive status.
CWP is an easily built enterprise workflow with self-service administration interface for process managers. Its greatest benefit is that IT involvement or programming is NOT required for a complete workflow implementation and administration.
Developing a new web application, building a new software solution and seeing how it changes the way businesses and people who work with it, learning their success stories inspires us. If you’re up to the challenge then apply for our jobs and get to work in a productive, inspiring workplace where your environment motivates you to come up with innovative ideas, get connected with each other through the daily work. We want you to join our team and grow with us together.
Benefits @Chronos Systems
Development and sales offices in Hungary (Budapest), Argentina (Buenos Aires), USA (Las Vegas), Poland (Warsaw).
|
|
|
|
|
|
|
|
|
|
|
|
|
|
|
|
|
|
|
|
|
|
|
|
|
|